Top-Rated Lenovo Computer Compared (July 2026)

Best Product
A+ Excellent
- Secure your price for 6 months. If it drops, we will level the score (T&Cs apply)
- With its 27 Inch Full HD IPS 300 nits display means that this AIO is perfect for comfortable collaborative working with a wider viewing angle for visual quality
- Powerful enough to run Microsoft Office, Zoom, Teams… All thanks to latest Windows 11 Home and smooth Wi-Fi 6 connection
- Fully equipped with a wireless EOS Keyboard and a wireless EOS Mouse, making it easy for day-to-day use or even office tasks

Best Value
A Very Good
- Immersive visuals: Enjoy a 23.8” FHD IPS panel, 16:9 aspect ratio and along 3-sided NearEdgeless, provide a broader view with a sleek and modern design that seamlessly fits into your workspace
- Versatile connectivity: Its HDMI and VGA ports ensure fast and seamless compatibility with computers, gaming consoles, and other devices, delivering quick connections without interference
- Experience the comfort: Say goodbye to eye strain with integrated flicker-free technology while enjoying the benefits of its adjustable tilt stand
- Stunning colors: With 99% sRGB color coverage and 250 cd/m² brightness, take your productivity to the next level with more precise and detailed colors
- Responsible approach: The Lenovo L24-41 adheres to environmental practices supported by the RoHS compliance, delivering both performance and sustainability in a single monitor
- Secure your price for 6 months. If it drops, we will level the score (T&Cs apply)
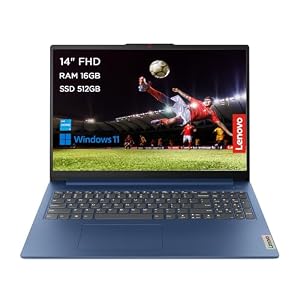
- Powerful performance - Engineered with military-grade quality, the IdeaPad Slim 3i Gen 8 laptop is ideal for on-the-go work, school, or entertainment. Powered by 12th Gen Intel Core i5 processors and 512GB of storage.
- Immerse yourself in the experience - Narrow bezels and FHD stunning display, while yours stays focused on the 14-inch high-def wide-angle view. TÜV Certified Low Blue Light helps avoid eye fatigue. Dolby Audio ensures you’ll enjoy premium sound.
- No waiting required - With its rapid-charging technology, the laptop delivers 2 hours of use on a 14-minute charge.
- Your privacy is secured – When it comes to your privacy and protection, we’ve got you covered. The webcam includes a privacy shutter, so you can ensure you’re off-camera when you want to be.
- Connections for all your needs: Wi-Fi 6 + Bluetooth, 2x USB 3.2 Gen 1, 1x USB-C 3.2 Gen 1, 1x HDMI 1.4, 1x Headphone / microphone combo jack (3.5mm), 1x Card reader, 1x Power connector.
- Secure your price for 6 months. If it drops, we will level the score (T&Cs apply)
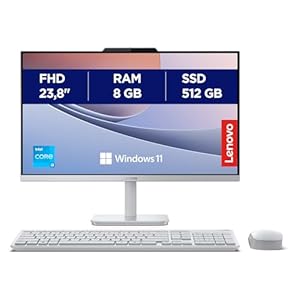
- Brilliance in every frame: the 23.8″ Full HD IPS display with 3-side thin bezels design and accurate color brings your photos and videos to life with vivid detail and true‑to‑life clarity
- A design beyond the aesthetic: this sleek all‑in‑one form factor streamlines and elevates your workspace, giving you a cleaner, more modern setup that reduces clutter, while its adjustable stand (-5° to 25°) ensures a perfectly comfortable viewing angle for every task
- Versatile connectivity: four USB‑A ports let you plug in accessories, storage, and peripherals with ease, while the HDMI output expands your workspace with a dual‑display setup that keeps you ready for work, play, and everything in between
- Effortless Every Day: A100 keeps everyday tasks effortless with smooth, reliable performance that makes everything feel easier, while delivering clear, seamless video calls so you stay connected without complications
- Efficient Power: Equipped with an Intel Core i3-N305 processor and robust memory capacity, the Lenovo A100 AIO delivers smooth, lightning‑fast performance that simplifies everyday tasks with effortless efficiency

- Secure your price for 6 months. If it drops, we will level the score (T&Cs apply)
- The IdeaPad 1 packs responsive performance in a thin and compact 17.9 mm chassis, making multitasking on-the-go a breeze.
- The 15.6-inch Full HD (1920x1080) TN 250 nits Anti-glare display and integrated AMD Radeon 610M Graphics.
- Stay always connected with Bluetooth and Wi-fi 6. Work from anywhere with 11 hours of battery life and with High-Definition Audio.
- Boost your performance with AMD Ryzen 5 processor with 16GB RAM and 512GB of storage.
- Take care of your privacy with Camera privacy shutter.
- [High-speed RAM & Huge Space] 16GB high-bandwidth RAM to seamlessly run multiple apps and browser tabs at once; 512GB PCIe NVMe M.2 solid state drive allows for fast boot-up and data transfer
- Intel Core i5-13420H Processor (8 cores, 12 threads, 12MB Intel Smart Cache, 1.5GHz based, max Turbo frequency up to 4.6GHz), with Intel UHD Graphics
- [Display] 15.6" FHD (1920 x 1080) Display
- TECHNICAL SPECS 1 x USB 3.0 Type-A, 1 x USB 2.0 Type-A, 1 x USB Type-C 1 x HDMI, 1 x RJ45, 1 x Headphone/Microphone Combo, Webcam, Numeric Keypad, Wi-Fi and Bluetooth
- [Operating System] Windows 11 Pro - Organize open apps with pre-configured layouts to optimize productivity, navigate with a more intuitive experience to get things done, collaborate with teams with more features
- Secure your price for 6 months. If it drops, we will level the score (T&Cs apply)
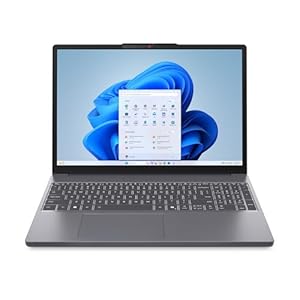
- Speed you can feel: The AMD Ryzen 7 7735HS and 16 GB RAM deliver smooth, efficient multitasking, empowering you with incredible all‑day battery life and durable AI performance built for the future
- Vivid visuals: The 15.3" WUXGA display with an IPS panel, 60 Hz refresh rate, and anti‑glare surface delivers hyper‑realistic images with 45% NTSC color gamut, offering smooth motion and crisp visuals
- Seamless connectivity: The IdeaPad Slim 3 Gen 10 includes USB‑A, USB‑C, HDMI 1.4, Wi‑Fi 6, and Bluetooth 5.3, ensuring fast, stable connections for work, study, and uninterrupted data transfers
- Power that keeps you moving: Enjoy long‑lasting battery life and Rapid Charge, giving you up to 2 hours of use with just 15 minutes of charging so you can work, study, or stream freely—without ever hunting for an outlet
- Sustainable by design: Our eco‑friendly technology reduces waste and energy use, using recycled materials and packaging that help divert resources from landfills, delivering sustainability without sacrificing quality

- Secure your price for 6 months. If it drops, we will level the score (T&Cs apply)
- Brilliance in every frame: the 23.8″ Full HD IPS display with 3-side thin bezels design and accurate color brings your photos and videos to life with vivid detail and true‑to‑life clarity
- A design beyond the aesthetic: this sleek all‑in‑one form factor streamlines and elevates your workspace, giving you a cleaner, more modern setup that reduces clutter, while its adjustable stand (-5° to 25°) ensures a perfectly comfortable viewing angle for every task
- Versatile connectivity: four USB‑A ports let you plug in accessories, storage, and peripherals with ease, while the HDMI output expands your workspace with a dual‑display setup that keeps you ready for work, play, and everything in between
- Effortless Every Day: A100 keeps everyday tasks effortless with smooth, reliable performance that makes everything feel easier, while delivering clear, seamless video calls so you stay connected without complications
- Efficient Power: Equipped with an Intel N100 processor and robust memory capacity, the Lenovo A100 AIO delivers smooth, lightning‑fast performance that simplifies everyday tasks with effortless efficiency

- Secure your price for 6 months. If it drops, we will level the score (T&Cs apply)
- Design and Military Grade - Available in Abyss Blue, this sturdy device is built in military-grade quality, withstanding shocks, dust, and extremes of travel in more hostile conditions.
- Immerse yourself in the experience - Narrow bezels and FHD stunning display, while you stay focused on the 14-inch display. TÜV Certified Low Blue Light helps avoid eye fatigue. Dolby Audio ensures you’ll enjoy premium sound.
- No waiting required - With its rapid-charging technology, the laptop delivers 2 hours of use on a 14-minute charge.
- Connections for all your needs: Wi-Fi 6 + Bluetooth, 2x USB 3.2 Gen 1, 1x USB-C 3.2 Gen 1, 1x HDMI 1.4, 1x Headphone / microphone combo jack (3.5mm), 1x Card reader, 1x Power connector.
More information about the best Lenovo Computer Offers and Deals:


| Colour | Luna Grey |
| Manufacturer | Lenovo |
| Weight | 7.1 kg |


| Colour | Raven Black |
| Manufacturer | Lenovo |
| Weight | 3 kg |

| Colour | Abyss Blue |
| Manufacturer | Lenovo |
| Weight | 1.37 kg |

| Colour | Cloud Grey |
| Manufacturer | Lenovo |
| Weight | 4.3 kg |

| Colour | Cloud Grey |
| Manufacturer | Lenovo |
| Weight | 1.58 kg |


| Colour | Black |
| Manufacturer | Lenovo |
| Weight | 1.65 kg |

| Colour | Luna Grey |
| Manufacturer | Lenovo |
| Weight | 1.59 g |

| Colour | Cloud Grey |
| Manufacturer | Lenovo |
| Weight | 4.3 kg |

| Colour | Abyss Blue |
| Manufacturer | Lenovo |
| Weight | 1.31 kg |
Lenovo is a renowned brand in the computer industry that manufactures high-quality and reliable computers for both personal and business use. The company is headquartered in China and has a global presence, with offices and manufacturing facilities across the world. Lenovo computers are known for their user-friendly interface, high performance, and durability, making them a favorite among tech-savvy individuals and professionals.
Lenovo offers a wide range of computer models, including laptops, desktops, workstations, and all-in-one PCs. Each model is designed to cater to different needs and requirements, from basic computing tasks to high-end gaming and professional work. Lenovo laptops are particularly popular for their portability, with models like the ThinkPad and Yoga series offering sleek designs, long battery life, and lightweight construction. On the other hand, Lenovo desktops are focused on power and performance, making them ideal for tasks like video editing and graphic design.
In addition to their hardware, Lenovo also provides various software solutions to enhance user experience and productivity. The brand's Vantage software allows users to customize their computer settings and optimize performance, while its security software protects against malware and cyber threats. Moreover, Lenovo's customer service and after-sales support are among the best in the industry, offering technical assistance, warranty services, and online resources for troubleshooting.
In conclusion, Lenovo computers are a reliable and versatile option for both personal and professional use. With a wide range of models, software solutions, and customer support, Lenovo has established itself as a leading brand in the computer industry. Whether you need a laptop for daily use or a desktop for high-end tasks, Lenovo has a variety of options to suit your needs.
** "Free Delivery" means that this is possible under the given conditions at the time of data retrieval from the relevant provider, but cannot be guaranteed. It is technically not possible to provide information in real-time. The shipping costs may vary under certain circumstances (different provider, place of delivery, etc.). The shipping costs shown in the further ordering process apply.
Other IMPORTANT INFORMATION that we ask you to take note of:
We may receive a commission if you make a purchase via the links on our site. This has no impact on the placement of the products on our site. Our website is part of amazon associates program - Amazon, Amazon Prime, the Amazon Logo and Amazon Prime Logo are registered trademarks of Amazon, Inc. or its affiliates.
Disclaimer:
1. The prices shown may have risen since the time we last updated them.
2. The actual price of the product on the seller’s site at the time of purchase will govern the sale.
3. It is not technically possible for the prices displayed above to be updated in real-time.
Frequently asked questions about Lenovo Computer:
How to reset Lenovo computer to factory settings?
Resetting a Lenovo computer to its factory settings is a simple and easy process. It is recommended to perform this action when the computer is experiencing performance issues or when selling it to protect your personal information. In this article, we will guide you through the steps on how to reset your Lenovo computer to its factory settings.
Before resetting your computer, it is important to backup all important data and files as resetting your computer will erase everything from the hard drive. Once you have backed up your files, you can proceed with the reset process.
To reset your Lenovo computer, first, turn off your computer completely. Next, press the Novo button located on the side or corner of your computer. The Novo button is a small button with an arrow-shaped icon. Press and hold the Novo button for a few seconds until the Novo Button Menu appears on the screen.
From the Novo Button Menu, select the System Recovery option and click Enter. This will launch the Lenovo OneKey Recovery software. Once the Recovery software loads, select the Restore from initial backup option, and click Next.
The software may prompt you to enter a verification code to confirm the reset process. You can find this code on the confirmation page when you created a backup of your computer. After entering the verification code, click Next to begin the reset process. The reset process may take some time, and your computer may reboot several times during the process.
Once the reset process is complete, you can start setting up your computer as a new device. Follow the on-screen instructions to complete the setup process. You can choose to restore your files from the backup you created earlier or start fresh with a new operating system.
In conclusion, resetting your Lenovo computer to its factory settings is a quick and easy process that can solve many performance issues. Remember to backup all important data and files before resetting your computer to avoid losing any valuable data. Follow the above steps to reset your Lenovo computer and start fresh with a new operating system.
How to connect Lenovo computer to WiFi?
Connecting your Lenovo computer to WiFi is a relatively straightforward process that requires only a few steps. First, make sure that your computer's wireless network adapter is installed and activated. This can usually be done through the device manager or the network and sharing center. Once you've confirmed that the adapter is active, you can proceed with the following steps:
1. Click on the WiFi icon in the system tray on your computer. This icon is usually located in the bottom right-hand corner of the screen and will look like either a series of bars or a globe. If the icon is grayed out, this means that your computer's wireless network adapter is switched off.
2. In the list of available wireless networks, select the network you wish to connect to. If your network does not appear in the list, click on the "Refresh" button to search for additional networks. Some networks may require a password or network key in order to connect. If your network requires a key, you will be prompted to enter it at this point.
3. Wait for your computer to connect to the network. Once a connection has been established, the WiFi icon in the system tray will change to show the strength of the connection.
4. Test your connection by opening a web page or another application that requires an internet connection. If you are unable to connect, try resetting your router or modem.
5. If you are still unable to connect, check your computer's network settings. Make sure that your computer is set to obtain an IP address automatically, and that no proxy settings are enabled.
6. If all else fails, try resetting the network settings on your computer. This can usually be done through the network and sharing center or by using the command prompt.
In conclusion, connecting your Lenovo computer to WiFi is a simple process that can be completed in just a few steps. By following the above instructions, you can quickly and easily connect your computer to the internet and start browsing the web. Remember to always keep your network settings up to date and secure in order to protect yourself from potential threats.
How to upgrade RAM on Lenovo computer?
If you're looking to upgrade the RAM on your Lenovo computer, you're in luck! This process is fairly simple and can be done in just a few easy steps. In this article, we'll walk you through the process of upgrading the RAM on your Lenovo computer.
Before we begin, it's important to note that not all Lenovo computers are user-upgradable. Some models have their RAM soldered onto the motherboard, which means you won't be able to upgrade it yourself. To see if your Lenovo computer is upgradable, check the manufacturer's website or consult your user manual.
Assuming your Lenovo computer is upgradable, the first step is to determine the type of RAM you need. You can do this by checking your computer's specifications online or by consulting the user manual. Once you've determined the type of RAM you need, it's time to purchase it. You can find RAM online or at most electronics retailers.
With your new RAM in hand, it's time to shut down your Lenovo computer and unplug it from the electrical outlet. Open up the computer case (if it's a desktop) or remove the bottom panel (if it's a laptop) to access the RAM slots. Locate the existing RAM modules and gently remove them by pushing down on the metal clips on either side of the module.
Next, install the new RAM by aligning the notches on the module with the notches on the slot and pushing down firmly until the metal clips snap into place. Be sure to insert the module in the correct orientation - it should only fit one way. If you're installing multiple modules, be sure to install them in pairs in the correct slots to take advantage of dual-channel memory.
Finally, put the computer case back together or replace the bottom panel and plug the computer back in. Once you power on your Lenovo computer, it should automatically recognize the new RAM. To verify that the new RAM is working properly, you can check your computer's system properties or use a free utility like CPU-Z.
In conclusion, upgrading the RAM on your Lenovo computer can be a simple and cost-effective way to boost performance. Just be sure to make sure your computer is upgradable and purchase the correct type of RAM, follow proper installation procedures, and you should be up and running in no time!
How to take a screenshot on Lenovo computer?
If you're using a Lenovo computer, taking a screenshot is quite easy. In fact, there are several ways to capture the screen on your Lenovo device, and we'll explore them all in this article.
Method 1: Using the Print Screen key
The easiest and most straightforward method of taking a screenshot on a Lenovo computer is by pressing the Print Screen key. The key is usually located at the top-right corner of your keyboard. Pressing it captures an image of everything displayed on your screen.
Once you've pressed the Print Screen key, you can then open a photo editing program like Paint and paste the image there. Alternatively, you can use the Windows + Print Screen keys to save the screenshot directly to your device's default image folder.
Method 2: Taking a Full Screenshot
If you want to capture everything shown on your screen, including open windows and folders, you can take a full screenshot. Here's how to do it:
- Press the Windows + Print Screen keys simultaneously
- Your screen will flicker, indicating that the screenshot has been taken
- The captured image will be saved to your device's default image folder
Method 3: Using the Snipping Tool
The Snipping Tool is a built-in Windows utility that allows you to capture a specific area on your screen. Here's how to use it:
- Open the Snipping Tool app by searching for it in the Start menu
- Click on "New" to start a new snip
- Use the cursor to select the area you want to capture
- Save the captured image to your device's default folder
Method 4: Using the Windows Game Bar
The Windows Game Bar is designed for gamers but can also be used to take screenshots. Here's how to do it:
- Press the Windows + G keys simultaneously to open the Game Bar
- Click on the camera icon to take a screenshot
- The screenshot will be automatically saved to your device's default image folder
In conclusion, taking a screenshot on your Lenovo computer is easy and straightforward. Whether you prefer using the Print Screen key, the Snipping Tool, or the Game Bar, you can capture any image you want in just a few clicks.
How to fix black screen on Lenovo computer?
A black screen is a common issue that affects Lenovo computers. It can be frustrating and prevent you from working or accessing important files. The problem can be caused by a variety of issues ranging from hardware to software problems. However, with a little troubleshooting, you can fix the black screen on your Lenovo computer. This article provides a step-by-step guide on how to fix the black screen on a Lenovo computer.
Step 1: Power Cycle Your Lenovo Computer
The first thing you should do when you encounter a black screen on a Lenovo computer is to perform a power cycle. This involves turning off the computer, unplugging it from the power source, and then pressing and holding the power button for 30 seconds. After that, reconnect the power source and try turning on your computer to see if the black screen is gone.
Step 2: Disconnect All Peripherals
Sometimes, peripherals such as external hard drives, USB flash drives, and printers can cause a black screen on a Lenovo computer. Try disconnecting all peripherals from your computer and then turning it on to see if it resolves the black screen issue.
Step 3: Update Your Graphics Card Drivers
Outdated or corrupted graphics card drivers can also cause a black screen on your Lenovo computer. You can fix this problem by updating your graphics card drivers. Go to the manufacturer's website to download the latest drivers for your graphics card. Once the download is complete, install the drivers and restart your computer.
Step 4: Perform a System Restore
System restore is a feature that allows you to restore your Lenovo computer to a previous point in time. It can fix problems such as black screens caused by software issues. To perform a system restore, go to the System Restore feature on your computer and select a restore point that was created before the black screen issue occurred. Follow the on-screen instructions to perform the restore and restart your computer.
Step 5: Reset Your Lenovo Computer
If none of the above methods work, you can try resetting your Lenovo computer. This will erase all data and settings on your computer, so make sure you back up your files before resetting. To reset your computer, go to the settings menu and select the reset option. Follow the on-screen instructions to complete the process. After resetting, your Lenovo computer should be working normally.
In conclusion, a black screen on a Lenovo computer can be fixed using several methods. These include performing a power cycle, disconnecting all peripherals, updating your graphics card drivers, performing a system restore, and resetting your computer. If the problem persists, you may need to seek professional help.
How to enable touchpad on Lenovo computer?
Lenovo computers are known for their superior hardware quality, design, and innovation. They come with an array of connectivity features and are sought after by users all over the world. However, there are times when things can go wrong, and the touchpad on your Lenovo computer may stop working. If you are experiencing this issue, then you need not worry. You can easily enable the touchpad on Lenovo computers using a few simple steps.
The first step to enable the touchpad on your Lenovo computer is to check if it is disabled. To do this, press the F6 key on your keyboard. This will enable or disable the touchpad on your computer, and you can see the status in the notification center. If the touchpad is enabled, then it will show a green light. If not, you will need to press the F6 key again to enable it.
Another way to check if your touchpad is enabled or disabled is to go to the Control Panel and click on the Mouse icon. This will open the Mouse Properties dialog box. Here, you can click on the Device Settings tab and select the touchpad from the list of devices. If the touchpad is enabled, then it will show as "Enabled" in the Status section. If disabled, you can click on the Enable button to activate it.
If the above two methods don't work, you can try updating your touchpad drivers. You can visit the Lenovo support website to download the latest drivers for your touchpad. Once downloaded, run the setup to install the drivers and update your touchpad.
Another way to enable your touchpad is to press the Windows key + I to open the Settings app. Here, click on the Devices option and select Touchpad from the left pane. You can then toggle the Touchpad switch to turn it on or off.
If all else fails, you can try resetting your Lenovo computer to its default settings. To do this, go to the Settings app, click on the Update & Security option, and select Recovery from the left pane. Here, you can click on the Get Started button under the Reset this PC option. This will reset your computer to its default settings, and hopefully, the touchpad issue will be resolved.
In conclusion, enabling the touchpad on your Lenovo computer is a simple process that can be achieved through a few simple steps. If you are experiencing issues with your touchpad, you can follow the above steps to enable it and get back to using your computer as usual. These steps are easy to follow and will help you in resolving the touchpad issue in no time.
How to boot Lenovo computer from USB?
Lenovo is one of the most popular computer manufacturers that produces a wide range of high-quality laptops and desktops. If you want to install a new operating system or boot your computer from a USB drive, it is essential to know how to boot Lenovo computer from USB. This article will guide you on the steps to boot Lenovo computer from USB.
Step 1: Create a bootable USB drive
The first step is to create a bootable USB drive that contains the operating system or files that you want to install. You can create a bootable USB drive using various tools like Rufus, UNetbootin, or the Windows USB/DVD Download Tool.
Step 2: Change the boot order
Once you have created a bootable USB drive, you need to change the boot order in the BIOS settings. To access the BIOS settings, restart the Lenovo computer and press the F12 key to enter the Boot menu. From there, select the USB drive in the boot menu and press Enter to boot from it.
Step 3: Enable the USB boot option
If your Lenovo computer does not detect the USB drive even after changing the boot order, it is likely that the USB boot option is disabled in the BIOS settings. To enable the USB boot option, go to the BIOS settings and navigate to the Boot tab. From there, enable the USB boot option and save the changes.
Step 4: Disable secure boot
If you are using a newer Lenovo computer that comes with the UEFI BIOS, you may need to disable the secure boot feature to boot from a USB drive. To do so, go to the Security tab in the BIOS settings and disable the secure boot option.
Step 5: Save and exit BIOS settings
After making changes to the BIOS settings, make sure to save the changes and exit the BIOS settings. The Lenovo computer will now boot from the USB drive, and you can install the operating system or access the files stored on the USB drive.
In conclusion, booting Lenovo computer from USB is a straightforward process that requires you to create a bootable USB drive, change the boot order, enable the USB boot option, disable secure boot (if necessary), and save and exit the BIOS settings. Following these steps correctly will allow you to boot your Lenovo computer from a USB drive and access the necessary files or install a new operating system.
How to recover deleted files on Lenovo computer?
Losing important data can be a frustrating and dreaded experience for anyone, especially when it comes to deleted files. It could be a file or document that you need urgently, and accessing it can be a top priority. However, it is not uncommon for Lenovo computer users to delete important files accidentally. If you are one of them, don't panic. There are several useful and effective ways to recover deleted files on Lenovo computers.
One way to retrieve your deleted files is to use a data recovery software. There are numerous tools available online that specialize in data recovery. Some of the popular ones include EaseUS Data Recovery, Recuva, Disk Drill, and Prosoft Data Rescue. These tools can help recover your files from various sources such as system crashes, accidental deletion, formatted drives, and more.
Another option is to use the Windows built-in file recovery feature. When a file is deleted, it is usually moved to the Recycle Bin. If the file is still in the Recycle Bin, you can quickly recover it by opening the Recycle Bin, finding the deleted file, and clicking the "Restore" button. However, if you have emptied the Recycle Bin, the file is potentially lost forever, and you may need to use a recovery software.
If you have created a backup of your files, you can retrieve your deleted files from the backup. It is always a good practice to keep a regular backup of your files to prevent data loss. Windows Backup and Restore is an in-built feature that allows you to create backup copies of most files and folders, including personal documents, photos, and music.
If you are unable to retrieve your deleted files using the above methods, you can seek professional data recovery services. Data recovery experts use advanced technology and techniques to recover your lost data from damaged, infected, or inaccessible drives. Although this option may be costly, it is the most reliable way to retrieve your deleted files when other methods fail.
In conclusion, losing data can be a nightmare, but don't give up hope. With the right tools and techniques, you can still recover your deleted files on Lenovo computers. Remember, always create backups of your essential files, be cautious when deleting files, and seek professional help if necessary. You can never be too careful when it comes to your data.
How to disable Lenovo computer camera/microphone?
Lenovo computers are widely used for their reliable performance and advanced features. However, if you are concerned about your privacy, you may want to disable the camera and microphone of your Lenovo computer. Here's how you can do it:
1. Disable the camera through the device manager: Click on the Windows button, type "Device Manager", and click on the resulting app. Expand the "Cameras" category, right-click on your Lenovo camera, and select "Disable device". This will turn off your camera until you enable it again.
2. Temporarily disable the camera/microphone through the settings: Click on the Windows button, type "Camera" or "Microphone", and click on the resulting app. From there, you can disable your camera or microphone temporarily by moving the toggle on the switch to the off position.
3. Disable the camera/microphone through the BIOS menu: Restart your computer and press the F1 or F2 key to enter the BIOS menu. Navigate to the "Security" or "Privacy" tab and look for options to disable your camera and microphone.
4. Use a privacy filter or physical cover for your camera: If you want to ensure complete privacy for your camera, you can use a privacy filter or a physical cover for your camera. These accessories prevent anyone from spying on you through your camera.
5. Uninstall the camera/microphone driver: You can also uninstall the driver for your camera or microphone to disable them completely. To do this, go to the "Device Manager" as shown in option 1, right-click on the device you want to uninstall, and select "Uninstall device".
6. Use a reputable antivirus software: Finally, it's always a good idea to have a reputable antivirus software installed on your Lenovo computer. This will help protect your privacy and prevent hackers from accessing your camera or microphone.
In conclusion, there are several ways to disable the camera and microphone of your Lenovo computer to ensure your privacy. By following these steps, you can prevent anyone from spying on you and have peace of mind knowing that your personal information is secure.
How to update Lenovo computer drivers?
Updating drivers on your Lenovo computer is an essential task you need to do regularly to ensure it runs optimally and secure. Inaccurate or outdated drivers can cause system errors, crashes, or security breaches. To update Lenovo computer drivers, you can take several approaches. Here are some steps you can follow to perform this task.
The first step is to identify which drivers need update. You can do this manually by going to the device manager on your computer. Once there, select each device that has an exclamation mark or a question mark beside it. After that, right-click on the device and choose "Update driver software." This process requires a stable internet connection.
Alternatively, you can use Lenovo's official website to find, download, and install the latest drivers. Visit the Lenovo support website and enter your computer's model number. The website will then display a list of drivers that are compatible with your system. Locate the driver you need, click on the download button, and save the file to a location on your computer. Finally, double-click on the downloaded file, and follow the instructions to install the driver.
Another option is to use a third-party driver updater tool. These tools scan your computer for outdated drivers, download and install the latest drivers in just a few clicks. Several driver updater applications are available online, but it's best to choose a trusted and reliable one to avoid downloading malware or other harmful software.
Before updating your Lenovo computer drivers, ensure you have backed up all your important files and data to prevent data loss. Also, check your current operating system version and compatibility with the latest drivers. Some drivers may not be compatible with your operating system, and attempting to install them may cause system crashes or other errors.
In conclusion, updating Lenovo computer drivers is a vital process that should be done regularly to keep your system functioning optimally and free from security threats. Whether manually or through automated third-party tools, ensure the downloaded driver is compatible with your system and always back up your data before installing any updates.
Other customers are also looking for the following product categories right now:
Lenovo Computer Review - Frequently asked questions
Which offer is the review winner product in July 2022?
You can instantly check the price and get further information here.
What deal with the best value for money is available according to our review / test?
The latest price we catched was
